
Foundational Concepts Series - Getting Started as a Microsoft (.NET) Stack Developer
- Posted in:
- Foundational Concepts
- LG Gram
- C#
- .NET Core
- ASP.NET Core
- Visual Studio
First Things First
"The only place you start at the top is digging a hole."
So you want to be a Microsoft (.NET) stack developer? Your head may be spinning from all the information out there and recommendations that you've either heard from other people or read online (e.g. Reddit). You might be feeling like you're being pulled in several directions.
I'd like to help you.
The purpose of this blog series, the Foundational Concepts Series, is to help introduce novice software developers to programming on the Microsoft stack. I first started coding when I was a kid and I've been using C# and .NET since 2003, so I'd like to think that I've learned a few things over the years. Even intermediate or advanced software developers may learn something new or fill in gaps in their knowledge from this blog series. My goal is to present the material in a fun and accessible format, so that the reader is left with not only a greater understanding of programming concepts and how to create quality software using one of the finest ecosystems out there, but also a passion for learning, so that you will continue to grow as a professional and as a person.
Let's embark upon our journey!
Prerequisites
Hollywood loves to portray programmers and other computer professionals as quirky, socially awkward, oftentimes specially-gifted geniuses (or villains) who have some innate set of talents or abilities that allow them to perform magical technological feats that save (or nearly destroy) the world. Nothing is further from the truth. While it is true that some individuals have a natural knack for programming, just like in every other field, exceptional programmers are made, not born. If you are stuck in the belief that A.) You are going to be awesome at programming without putting in any hard work or B.) You cannot ever become a great programmer because ________, then I suggest you read the book Mindset: The New Psychology of Success by Carol Dweck.
In my humble, expert opinion the only mandatory qualities that you need to become an exceptional software developer are:
1. You must be smart.
If you are reading this, then you probably already are. Moreover, intelligence is not fixed, so crack open a book and start making yourself smarter. If your I.Q. is over 100 then you have the bare necessary intelligence to program computers. The cast of Jersey Shore cannot ever become software developers.
2. You must enjoy solving hard problems and be okay handling complexity in your work.
Every project and problem you encounter through the course of your career will be a unique instance of chaos-in-a-bottle. Be prepared. You will be faced with various forms of complexity in your work, and your job will be to manage that complexity.
3. You must have a passion for learning and the discipline to keep growing.
If you don't enjoy learning and don't have the commitment to keep developing yourself, then this is not the career for you. Seriously, stay out of my profession. The technology space is literally in a constant state of change, with new developments occurring every minute of every day. You don't have to keep up with everything and it's ludicrous to even try, but you do have to develop your skills and specialize in an area or two.
Aside from these, there really isn't much that's required to become a software developer. You don't need some amazing gaming rig with four graphics cards, 64 cores and 128GB of RAM. That's way overkill. Once you've cultivated the right mindset and made the commitment to learn, the only real material requirements to developing software are the following:
1. A computer.
This is obvious. If you want to learn how to program computers, you need a computer. I recommend a laptop. Why? It gives you freedom. This is extremely important if you want to get into freelancing, consulting, etc. Additionally, software development is a creative process, and sometimes you want to work from environments other than your usual workspace, such as coffee shops or shared office spaces. Plus, you may have to travel, and you're not going to be able to bring your ATX tower onto a plane. Now, what about the specs for this computer? In actuality, you don't need an amazingly powerful machine to develop software. You could get a perfectly reasonable programming laptop for under $1000. My recommendation is that you spend a little bit more, and I'll explain why in a bit. As I alluded to, a gaming laptop is overkill and you will never push it to its limits UNLESS you are engaged in very specific disciplines, such as:
- Game development (duh).
- Augmented reality/virtual reality.
- Certain types of artificial intelligence or machine-learning (even still, you might not need to go super high-end).
- Proprietary trading, block chain, or other kinds of computation-intensive activities.
- Specialized scientific applications (think trying to model climate change, etc).
If your plan is to get into one of the niche areas I've described above, then go ahead and build a monster desktop machine with a 64-core Thread Ripper CPU and a bunch of CUDA cards in it. However, for web/mobile development (which is probably about 80% of the field at this time) and a smattering of desktop apps, you can and should skimp on the graphics because that will A.) save you a ton of money, which you can put toward other features and B.) make your computer much, much quieter (gaming laptops are loud because of the fans needed to cool the GPUs). So then, what actually matters in a programming computer?
- A decent CPU. Yes, you are still doing computations, compiling code and likely running multiple applications while you work, so you need a modern processor. I really don't recommend going with the budget CPUs that they put in low-end corporate computers and a two-banger (dual-core) processor isn't going to cut it. Go with a nice, fast CPU that has at least four cores.
- Memory (RAM), lots and lots of memory. I cannot stress enough the importance of this. You will almost certainly have several applications open at one time while you work, and a few of those will be memory-hogs. Docker and various database engines such as SQL Server will chew through your RAM faster than you can bat an eye. Visual Studio needs memory if you want to make the best use of it and be fully productive. You may want to spin up some RAM disks to speed up build times, or whatever. If you skimp on RAM and your operating system has to start swapping to disk, your productivity will crater, and guess what? Your time is worth far more than the money you would have spent on additional memory. At the time I'm writing this (late 2019), standard laptops ship with 8GB of RAM. I recommend at least 16GB. If you're able to upgrade the RAM in your system, then max it out. You'll be really glad you did.
- Solid state drive. SSD technology has come a long way in the past decade, so this is almost a no-brainer. Once again, you want your operating system and software tools to load fast. Write times on SSDs have improved significantly and it's highly unlikely you'll be doing work on your development machine that requires several terabytes of disk space, so go with an SSD. I recommend a minimum of 512GB (half a terabyte) so that you have plenty of space to install your tools, multiple versions of Visual Studio, if necessary, etc.
- A nice screen. A good, clear, crisp picture with plenty of room to work will serve you well. That's why I recommend a 17" IPS display if at all possible. The better you can see, the better you can code.
- Decent battery. You will not always have access to an outlet while you work and it's a massive bummer if you have to shut down your computer while you're in the zone and cranking out some of the best code you've ever written. A decent laptop should be able to go 6-8 hours on a charge. There are some out there that can double that. Also consider upgrading the battery (if your laptop supports it) if you plan on working unplugged a lot.
- Good keypad. This is also pretty obvious. You'll be typing a lot, so make sure that it's comfortable. If at all possible, go to an actual brick-and-mortar store near you where you can test out the laptop you're interested in and see how the key action feels. Now imagine yourself doing that for several hours a day.
- Other niceties. Features such as a Thunderbolt 3 port so that you can get a dock for your machine, USB 3.x, fast ethernet, wireless, etc will make your life easier. Also, see how much it weighs. You want a laptop that's nice and light. I set the bar at 5 pounds. Anything more than that I will tend to shy away from, less than that, great. Remember, you are going to be hauling this thing around with you.
- Not necessary: laptops that ship with optical disc drives are unusual these days but suffice it to say, you don't need it and it'll just take up valuable space. Touchscreen is another feature that I avoid because you don't need it to write code and it drives up the cost of the machine.
My machine: When all was said and done, I chose to purchase the LG Gram 17 as my primary programming laptop. No, I'm not getting paid by LG. I made my decision based upon pragmatic research and reading several reviews, as well as trying out the computer in person to see how it felt. It meets all the criteria I laid out above, and I think it's a great all-around programming laptop. Here are the specs:
- 8th generation Intel i7 CPU
- 16GB RAM, upgradable to 20GB
- 256GB SSD, upgradable to 512GB
- 17" IPS display
- Battery life up to 19.5 hours
- Thunderbolt 3, USB 3.0, and all that jazz
- Super light-weight--less than 3 pounds!
Another consideration for you is where you buy your computer from. Shop around, there are deals out there. Also, don't shy away from open box items. "Open box" just means that somebody purchased the computer, got buyer's remorse, and returned it right away. Depending on the situation, you may be able to get an essentially new machine at a fantastic discount. Additionally, if you already have your S-corp or LLC, you may be eligible for a business credit card that gives you bonus cash back on hardware and software purchases from specific vendors (hint, hint). Do your homework before purchasing.
2. A desk, a chair, and peripherals.
- For your standard home workspace, you need a desk that's tidy and has plenty of space for multiple monitors, books, and your computer.
- You want to get a chair that's comfortable and provides ergonomic support. You will be spending a lot of time sitting in it. Herman Miller makes some great chairs that you can sometimes get an amazing bargain for, but you have options. Shop around.
- A keyboard and mouse that are comfortable (and preferably also designed with ergonomics in mind). DO NOT SKIMP ON THESE. How much are your hands worth? Probably a lot more than the money you would have saved buying some cheapo keyboard and mouse from the thrift store. I use the Microsoft Sculpt ergonomic keyboard. It's worth it.
- A good monitor. Actually 2 to 3 monitors (any more than 3 monitors is unnecessary in my opinion). Make sure it has a nice, sharp image and that text is clear and easy to read on it. You don't need ultra-high-end monitors like what artists and photographers use, but you do want something that's going to be easy on your eyes and makes it easier to scan through myriad lines of code in a workday. I'd recommend at least 24" monitors. Another consideration in this area is what the lighting is like in your workspace. Spending a few bucks on anti-glare screens for your monitors is a good investment.
3. Development Software.
You need software to create software. Aside from your laptop and base set of hardware, all of the tools that you will use to perform your craft will be software packages, in particular, an IDE (Integrated Development Environment). As a Microsoft Stack developer, your IDE is Visual Studio (at this time, Visual Studio 2019). I've worked on other stacks at various points in my career and used other IDEs (*cough*, Eclipse) and I will tell you with conviction, Visual Studio is the best one out there, by far. None of the other ones even come close. In theory, you could use simple text editors and/or other IDEs to do .NET development, but why? Visual Studio Community Edition is free for individual developers and it contains all the same features as Professional Edition, including CodeLens. So go download Visual Studio and get cracking. Heck, even if I were working on a different stack, such as the Node stack, I'd probably still use Visual Studio. Now, without getting too far ahead of ourselves, I will tell you that you should download and install Visual Studio manually (as opposed to using a package manager like Chocolatey. See below). Why? Because there are various workloads and configurations that will differ from developer to developer. For example, I love F#. I think it's the best thing since sliced bread. If you're just starting out on the Microsoft Stack, then you will be learning C# and won't touch F#, so you don't need to install it. Likewise, you will probably need the web development workload but won't touch Unity/game development, or vice versa. The point is, there is no one-size-fits-all configuration.
In addition to your IDE, you cannot develop software without SDKs (Software Development Kit). These are the base compilers, tools, and runtimes that allow you to create working software. In the Microsoft world, you will be using the .NET Core SDK. At the time of this writing, the release version of .NET Core is 2.2 and version 3 is still in pre-release. There isn't a lot of configuration that goes into the SDK, so you can install it via command line, which I will show you below.
4. Additional software tools.
You will not only be using your IDE/SDK to develop software, but will require a host of other tools to do things like check in to source control, debug your code, test HTTP endpoints, do graphics manipulation, and more. Back in the day, we had to go out on the Web and manually download everything we wanted to install, which was a long and laborious process. I recommend you download Chocolatey, a package manager for Windows, to install your additional tools. It will make your life easier. You can find instructions at https://chocolatey.org/. Caveat: make sure you go on their site and check each package to see if it's marked as trusted before you install it on your machine. To get an idea of what additional software tools you might need, see below for what I installed on my computer.
How I Set Up and Configured My Machine
When you first boot up your laptop, Windows 10 will make you go through some configuration steps like setting up your time zone, setting a password, etc. These are all pretty self-explanatory. The desktop of a freshly-configured LG Gram looks something like this:
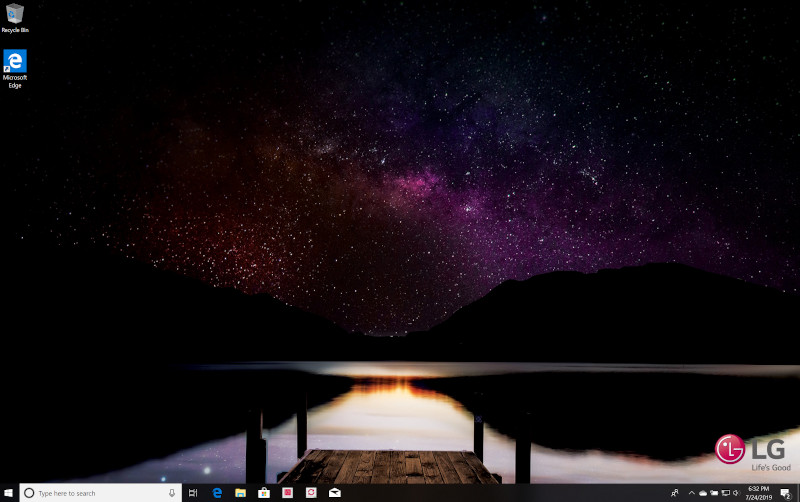
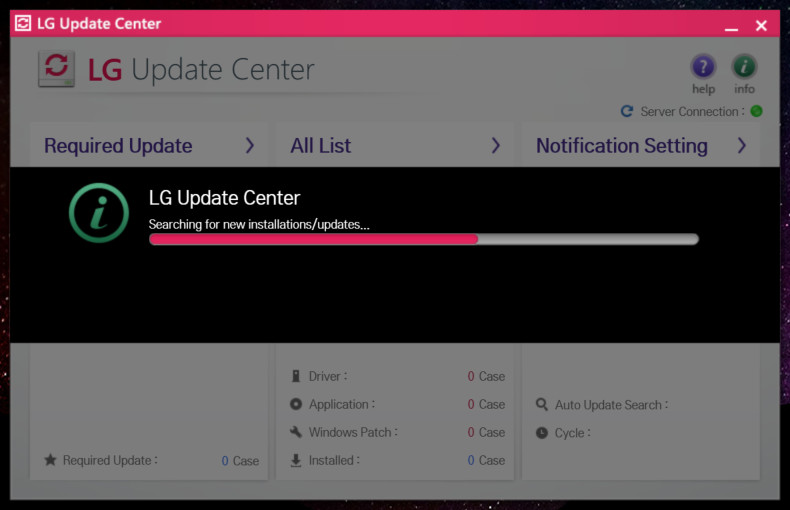
Before doing anything else, you want to update the laptop by clicking on the LG Update Center.
Next, type "windows update" into Cortana/Search and click on "Check for updates" to run Windows Update. There will be a bunch of pending updates. Click "Install Now".
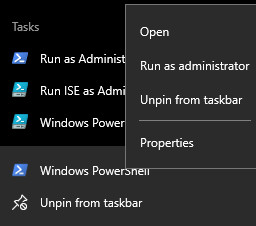
Now, you're going to start pinning commonly-used apps to your task bar. Type "powershell" into Cortana/Search and right-click "Windows PowerShell" click on "Pin to Taskbar" from the context menu. Do the same for "PowerShell ISE".
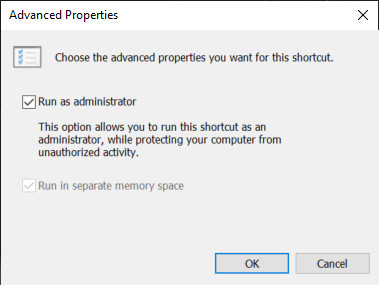
Right-click the two PowerShell icons that are now on your task bar. Right-click again on the name of each program from the context menu that appears. A second context menu will appear. Click "Properties" as shown. Click the button that says, "Advanced...". Click the check box that says, "Run as Administrator". Now they will always run under elevated privileges when you click on them from the task bar. Do this for both.
If you're not familiar with PowerShell, you will be 😉
Unless stated otherwise, the rest of the steps you need to configure your machine can be run as PowerShell commands from either the PowerShell command prompt or the PowerShell ISE. I prefer to run each command one-by-one rather than cramming them all into a PowerShell script file and trying to run them all at once. Why?
- Something can and will go wrong, so you may need to think critically and adjust your approach accordingly.
- Certain steps are best done manually for various reasons.
- Some steps will require closing and re-opening your PowerShell session, or even rebooting your entire system.
- You may wish will definitely want to configure your machine differently from mine, so various steps may be excluded or added.
- The installation/configuration process can be notoriously finicky, even on similar machines.
- Something can and will go wrong.
I understand that there are various open-source tools out there that attempt to entirely automate the installation of a new development machine, such as Box Starter (https://boxstarter.org/) and its accompanying scripts (https://github.com/Microsoft/windows-dev-box-setup-scripts). Unless you work in an IT department at a large company and are setting up dozens of work laptops at one time, I really don't recommend using automated scripts for all of the reasons that I've outlined above. As I said before, there rarely is a one-size-fits-all configuration among developers, even within the same organization. I'm not going to belabor the point further, so let's move on to the actual steps. Once again, I'm assuming that you are running Windows 10 Home on an LG Gram 17. If you have a different laptop or edition of Windows, you will want to alter these steps to suit your individual needs.
Run these commands inside a PowerShell session.
Phase 1 - Basic Configuration
#--- Configuring Windows properties ---

#--- Windows Features ---

# Show hidden files, Show protected OS files, Show file extensions

Set-ItemProperty HKCU:\Software\Microsoft\Windows\CurrentVersion\Explorer\Advanced Hidden 1

Set-ItemProperty HKCU:\Software\Microsoft\Windows\CurrentVersion\Explorer\Advanced ShowSuperHidden 1

Set-ItemProperty HKCU:\Software\Microsoft\Windows\CurrentVersion\Explorer\Advanced HideFileExt 0

#--- File Explorer Settings ---

# will expand explorer to the actual folder you're in

Set-ItemProperty -Path HKCU:\Software\Microsoft\Windows\CurrentVersion\Explorer\Advanced -Name NavPaneExpandToCurrentFolder -Value 1

#adds things back in your left pane like recycle bin

Set-ItemProperty -Path HKCU:\Software\Microsoft\Windows\CurrentVersion\Explorer\Advanced -Name NavPaneShowAllFolders -Value 1

#opens PC to This PC, not quick access

Set-ItemProperty -Path HKCU:\Software\Microsoft\Windows\CurrentVersion\Explorer\Advanced -Name LaunchTo -Value 1

#taskbar where window is open for multi-monitor

Set-ItemProperty -Path HKCU:\Software\Microsoft\Windows\CurrentVersion\Explorer\Advanced -Name MMTaskbarMode -Value 2

#--- Enable developer mode on the system ---

Set-ItemProperty -Path HKLM:\Software\Microsoft\Windows\CurrentVersion\AppModelUnlock -Name AllowDevelopmentWithoutDevLicense -Value 1
Phase 2 - Uninstall Pre-installed Bloatware
# Remove pre-installed apps

function removeApp {

       Param ([string]$appName)

       Write-Output "Trying to remove $appName"

       Get-AppxPackage $appName -AllUsers | Remove-AppxPackage

       Get-AppXProvisionedPackage -Online | Where DisplayName -like $appName | Remove-AppxProvisionedPackage -Online

}

# To get list of installed apps: get-appxpackage -AllUsers | Select Name, PackageFullName

# Pick and choose what to uninstall on your system.

$applicationList = @(

"*Bing*"

"*Xbox*"

"king.com*"

"Microsoft.Getstarted"

"Microsoft.GetHelp"

"Microsoft.MicrosoftSolitaireCollection"

);

foreach ($app in $applicationList) {

    removeApp $app

}
Phase 3 - Install Commonly-used (Developer) Tools
# Install Chocolatey

Set-ExecutionPolicy Bypass -Scope Process -Force; iex ((New-Object System.Net.WebClient).DownloadString('https://chocolatey.org/install.ps1'))

#--- Browsers ---

choco install -y googlechrome

choco install -y firefox

# tools we expect devs across many scenarios will want

choco install -y nodejs

choco install -y kdiff3

choco install -y git --package-parameters="'/GitAndUnixToolsOnPath /WindowsTerminal'"

choco install -y gitextensions

choco install -y vscode

choco install -y python

choco install -y 7zip

choco install -y sysinternals

choco install -y notepadplusplus

choco install -y imdisk

choco install -y imdisk-toolkit

choco install -y winmerge

choco install -y wireshark

choco install -y postman


#Restart powershell session now


#--- Browser extensions for VSCode ---

code --install-extension msjsdiag.debugger-for-chrome

code --install-extension msjsdiag.debugger-for-edge

#--- Microsoft WebDriver ---

choco install -y microsoftwebdriver

# Additional tools

choco install -y keepass

choco install -y inkscape

choco install -y evernote

choco install -y paint.net

choco install -y adobereader

choco install -y filezilla

choco install -y audacity

choco install -y screentogif

choco install -y gimp
At this point I recommend downloading and installing a freeware tool called TextCrawler, which is not available via Chocolatey. I have found it to be immensely useful for working with legacy code bases and other file search operations. You can get it here.
Phase 4 - Install Visual Studio
At this point you are going to want to install Visual Studio 2019. Unless you work in an enterprise organization (see licensing details here) you can download Community Edition for free, which includes all the same features as Professional, including CodeLens.
For my configuration I picked the following workloads:
- ASP.NET & web development
- Azure development
- .NET desktop development
- Mobile development with .NET
- Data storage & processing
- Data science & analytical applications
- .NET Core cross-platform development
The Visual Studio installer also lets you export your configuration, so if you'd like to automatically install the workloads that I've used, you can download my setup as a .vsconfig file from here.
Phase 5 - Enable Advanced Windows Features
#.NET Core SDK

choco install -y dotnetcore-sdk


#Windows subsystem for Linux

choco install -y Microsoft-Windows-Subsystem-Linux --source="'windowsfeatures'"


# REBOOT YOUR PC NOW


#--- Ubuntu ---

choco install wsl-ubuntu-1804

wsl

sudo apt update

sudo apt upgrade -y

sudo apt install ansible -y

exit
Phase 6 - Install Microsoft Azure-related Tools
choco install -y powershell-core

choco install -y azure-cli

choco install -y microsoftazurestorageexplorer

choco install -y terraform
Phase 7 - Configure Visual Studio
Now you're going to want to run Visual Studio 2019 for the first time. You can perform basic configuration steps like selecting a core color scheme, etc.
Note: For my current installation, I chose to go with the "General" development settings rather than "C#", because it has the standard, more well-known hotkey configurations. You can change this at any time by clicking on "Tools->Import and Export Settings." See more here.
I typically go with the "Blue" color scheme, and I update my fonts and colors using "Tools->Import/Export Settings" to a custom theme which is a modified version of the classic ZenBurn theme for Linux editors like Vim or Emacs. You can see what it looks like here and you're welcome to download a .vssettings file here.
Phase 8 - Install SQL Server Management Studio
Go to https://docs.microsoft.com/en-us/sql/ssms/download-sql-server-management-studio-ssms?view=sql-server-2017 to download and install SSMS. This is another tool, along with Visual Studio, that is a must-have.
Phase 9 - Create a Restore Point
Last but not least, you want to create a restore point for your freshly-configured computer before doing anything else. That way, if anything goes wrong you can always fall back to a previous, clean configuration.
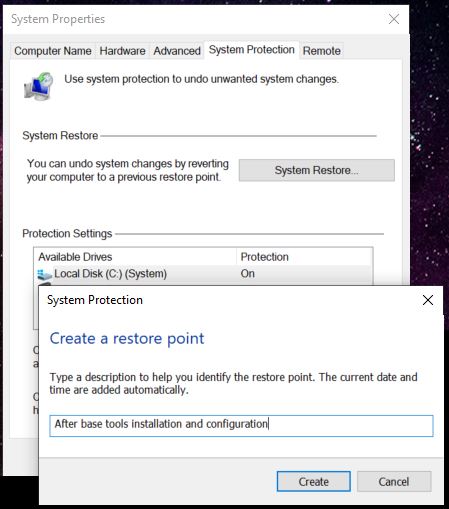
There is some very good guidance on how to do that here.
Conclusion
If you're new to software development, your head may be spinning from all the steps required to go from ambition to writing actual code, and that may especially be true on the Microsoft (.NET) stack, which has traditionally been viewed as more of an "enterprise" stack. Aside from a comfortable workspace and basic computer (laptop with a decent processor and lots of RAM), along with some software tools that are typically free, you really don't need much. Tools like PowerShell and Chocolatey can greatly ease the process of configuring your machine and installing a core set of software packages, saving you a few late nights, bloodshot eyes, and several bottles of Mountain Dew. Finally, I discussed how you can get Visual Studio 2019 Community Edition for free, which contains all the same features as Professional Edition (now you really don't have any excuse not to start playing with it!). You have everything you need to start building solutions on the Microsoft stack. Get out there, start learning, and go build something!
This is entry #1 in the Foundational Concepts Series
If you want to view or submit comments you must accept the cookie consent.